


London Joinery Partner for Interior Design Studios

Updated: 2 days ago
A joinery partner for interior design studios should do more than make cabinetry. They should carry your design intent through kitchens, fitted furniture and interior features, resolving details so each piece sits naturally within its setting. In London homes, this can mean designing around uneven walls, sloping ceilings and other irregular spaces.
A successful interior depends on more than a strong visual idea. Materials, proportions, storage and the relationship between joinery and existing architecture all need careful coordination. The right working relationship gives your concept a practical route from design development to manufacture and installation, while keeping authorship with your studio.
This article explains how joinery can support the wider interior, what to coordinate early and how bespoke work can respond to the specific conditions of a room. It also considers how kitchens, cabinetry and individual features can form a coherent whole, with precise detailing and material choices that serve the design rather than distract from it.
Table of Contents
How bespoke joinery supports interior architecture
Bespoke joinery is developed around a room’s architecture, intended use and design direction. Its value lies in meeting practical requirements while preserving the character of the wider interior.
Bespoke Joinery in Practice
Bespoke joinery is woodwork designed and manufactured for a particular project, with dimensions, materials and finishes chosen for its setting. Examples include fitted wardrobes shaped around a sloping ceiling, kitchen cabinetry planned for a specific layout, and wall panelling aligned with existing details. For architects, the key consideration is how each element meets adjoining surfaces and supports the room’s use.
In a London period home, a bookcase might need to follow an uneven chimney breast while maintaining a balanced elevation. A joiner’s technical expertise can help translate the design into practical details, including shelf depths, door clearances and junctions with skirting. The same process applies to contemporary interiors, where clean lines depend on carefully resolved edges and transitions.
Bespoke, Customised and Made-to-Measure
These terms describe different levels of adaptation. Bespoke joinery starts with the project’s requirements and develops the design, dimensions and finish around them. Customised work changes selected features of an existing design, while made-to-measure work adjusts dimensions to suit a particular space.
When reviewing a proposal, identify what is being designed specifically: the overall form, internal arrangement, material palette or only the external dimensions. A fitted wardrobe may be made to measure in width but retain a predetermined internal layout. A bespoke design can instead respond to storage needs, a sloping ceiling and the room’s visual language together.
Design Collaboration and Visual Consistency
Effective collaboration keeps the studio’s authorship of the concept while bringing joinery expertise into technical development. Share the design intent, material palette, drawings and functional requirements, then resolve dimensions, junctions and installation details together. To assess a joinery partner, review relevant completed work, drawing quality, manufacturing capabilities and examples of comparable projects.
Discuss responsibility in writing before work begins. The agreement should define the approved scope, drawing and finish sign-off, revision process, programme, installation responsibilities and change control. It should also explain how the proposal is itemised and how payment stages relate to agreed project milestones. Request evidence of insurance relevant to the work, and assess accreditations against the contractor’s stated scope and competence.
Building and fire-safety considerations for fitted joinery depend on the project, the building and the joinery’s location and use. Coordinate the design with the project architect and relevant building or fire-safety professionals, especially where joinery meets protected doors, escape routes or specified fire-resistant construction. Record agreed requirements in drawings and specifications before manufacture.
Materials, Finishes and Costs
Common choices include solid timber, veneered panels and painted finishes. Timber grain brings natural variation; veneer allows a consistent grain across larger surfaces, while paint offers a controlled colour. Lacquered finishes, edge profiles, hardware and shadow gaps also shape the final appearance. Compare samples with neighbouring flooring, worktops and wall finishes.
Material and finish choices differ in preparation, detailing and application, so compare their specification and labour requirements rather than judging by appearance alone. For example, a carefully matched veneer calls for attention to grain direction, while a painted finish depends on consistent surface preparation. Approve samples and finish references before manufacture to keep the completed interior visually coherent.
Collaborative joinery manufacturing for architects and interior designers
Good collaboration lets a studio retain authorship while resolving how its design will be made and installed. Agreeing information, responsibilities and approvals early gives the project team a clear route from concept to completed joinery.
From Concept Drawings to Installation
At the outset, share concept drawings, room layouts, material intent and the client’s functional requirements. The joinery partner can then develop technical details, identify what information is needed and clarify which decisions remain with the designer. A joinery schedule can record each item, its location, finish and drawing reference, helping the studio coordinate the package with the wider residential specification.
During development, designers and joiners can review details together, such as door proportions, internal arrangements and junctions between cabinetry and adjacent finishes. Keep a clear record of drawing revisions and sample approvals so the workshop and site team work from the same agreed information. Before installation, confirm access, delivery sequencing and site readiness with the project team.
Manufacturing Lead Times
There is no single typical lead time for bespoke joinery design, manufacture and installation. The programme depends on design complexity, drawing and sample approvals, material choices, workshop scheduling, site access and installation sequencing.
Set out the project stages in the programme, including technical development, approvals, manufacture and fitting. Agree when the studio will issue information and when the joinery team needs decisions. If a finish or dimension changes after approval, record the effect on drawings and sequencing before work proceeds. This gives the studio and client a clearer view of dependencies.
Manufacturing, fitting or quality issues can arise if responsibilities, drawings or approved finishes are unclear. Manage these risks through a defined scope, a controlled drawing set, documented sign-offs and an agreed route for resolving queries. Identify who coordinates site measurements and reports installation issues. At completion, compare the work with the approved specification and record any adjustments for follow-up.
For London studios, a joinery partner should coordinate closely with the design team, workshop and site. Confirm communication routes, drawing responsibilities and installation planning at the start. This is especially useful when a project involves several trades or the joinery must align with finishes completed by others.
Keep the designer involved at each decision point. A shared schedule, current drawings and recorded approvals help protect design intent from concept through manufacture and installation.
Custom storage and cabinetry for residential interiors
Storage works best when its layout reflects what a room needs to hold and how people use it. In a London home, that might mean a wardrobe shaped around a chimney breast, a media wall with concealed wiring, or cabinetry that makes use of an overlooked alcove. Drawings should connect these uses to the room’s dimensions, construction and finishes.
Make Awkward Spaces Useful
An alcove beside a chimney breast can accommodate shelves, closed storage or both. Under a staircase, the changing ceiling line may suit cupboards with different internal depths. In each case, accurate site dimensions help the design respond to the actual walls, floor and skirting instead of assuming square corners.
Show the usable interior on the drawings, not only the exterior elevation. A deep cupboard may look generous but be difficult to reach at the back; shallow shelves may suit books or display objects better. For a loft room, mark the sloping ceiling and identify where hanging space, drawers or low cupboards will fit comfortably.
Integrate Media and Everyday Storage
A media wall can combine space for a television with cupboards, open shelving and room for decorative objects. Its design should account for the television’s position, visible cables, equipment access and nearby sockets. Include these points in the specification so the joinery and electrical drawings can be coordinated before construction.
Storage needs are specific to each household. A home office might need shelves for files and a suitable space for a printer; a family living room may need closed cupboards for toys alongside open display shelves. These requirements shape internal divisions, door positions and shelf heights, while coordinated finishes connect the cabinetry to the wider interior.
Plan Wardrobes Around Clothing
Wardrobe interiors should reflect the clothes and accessories being stored. Separate areas for long garments, shorter hanging, folded clothing and shoes can make the layout more useful. Drawings should show the internal arrangement as well as the doors, making the relationship between hanging space, drawers and shelves clear before manufacture.
In a compact bedroom, full-height fitted wardrobes can use wall space above the reach of freestanding furniture. In a dressing room, a sequence of wardrobes and drawers can organise clothing while preserving a clear route through the space. Consider door style, handles, internal lighting requirements and finishes alongside the room’s other surfaces.
To bring these elements together, start with an inventory of what each space needs to store, then map those requirements onto measured drawings. Confirm internal layouts, finishes and access before construction progresses. This gives the design team a clear basis for coordinating cabinetry with adjacent walls, flooring and services, and for creating storage that belongs to the room’s composition.
Working with irregular walls, floors and ceilings
In London period homes, joinery often meets historic details that do not follow modern straight lines. Deep skirting, projecting door linings, decorative cornices or boxed pipes can interrupt a clean elevation. Treat each as a measured design condition, then decide whether the joinery should align with it, stop before it or form a deliberate transition.
Consider a bay window. Its angled returns and changing wall depth affect how a fitted element sits within the room. A measured drawing can show the bay’s plan shape, the position of its reveals and its relationship to nearby doors. This lets the designer set out the composition around the actual geometry instead of forcing a regular form into an irregular opening.
Walls can bow or twist across their height. A tall panel fixed against such a surface may reveal changing gaps along its edge. The design can use a scribed edge, a carefully dimensioned return or a purposeful shadow line to resolve the junction. The choice should suit the intended finish and visual language of the room, not simply conceal a discrepancy.
Floor transitions need their own detail. In a period property, timber boards may meet stone or tile, with a threshold between them. A joinery elevation should show how its base relates to that threshold and whether the visual line continues across adjoining surfaces. Coordinating these junctions helps prevent a cabinet or panel from appearing unintentionally out of alignment.
Ceiling details can influence the top of a fitted feature even when the ceiling is level. Picture rails, cornices and ceiling roses may set limits on height or position. A design can preserve these elements, frame them or finish below them with a clear termination. Confirming the intended relationship in the elevation gives the workshop and installer an agreed reference.
Services add another layer to site conditions. A radiator pipe rising beside a wall, a surface-mounted cable route or an existing access panel can affect the position and depth of joinery. Show these elements on coordinated drawings and establish how the finished work will retain the required access. This keeps the design useful without treating building services as an afterthought.
Before installation, compare the latest site information with the approved drawings and note changes that affect junctions. This matters especially after plastering, new flooring or alterations to door casings. The design team can then agree a response before fitting begins, rather than leaving the installer to make an unrecorded design decision on site.
Irregular architecture need not be erased to create a composed interior. In a London home, a considered line, return or termination can acknowledge existing character while giving each fitted element a precise purpose. Make every junction intentional and carry that decision consistently from drawing through installation.
Kitchens, furniture and interior features
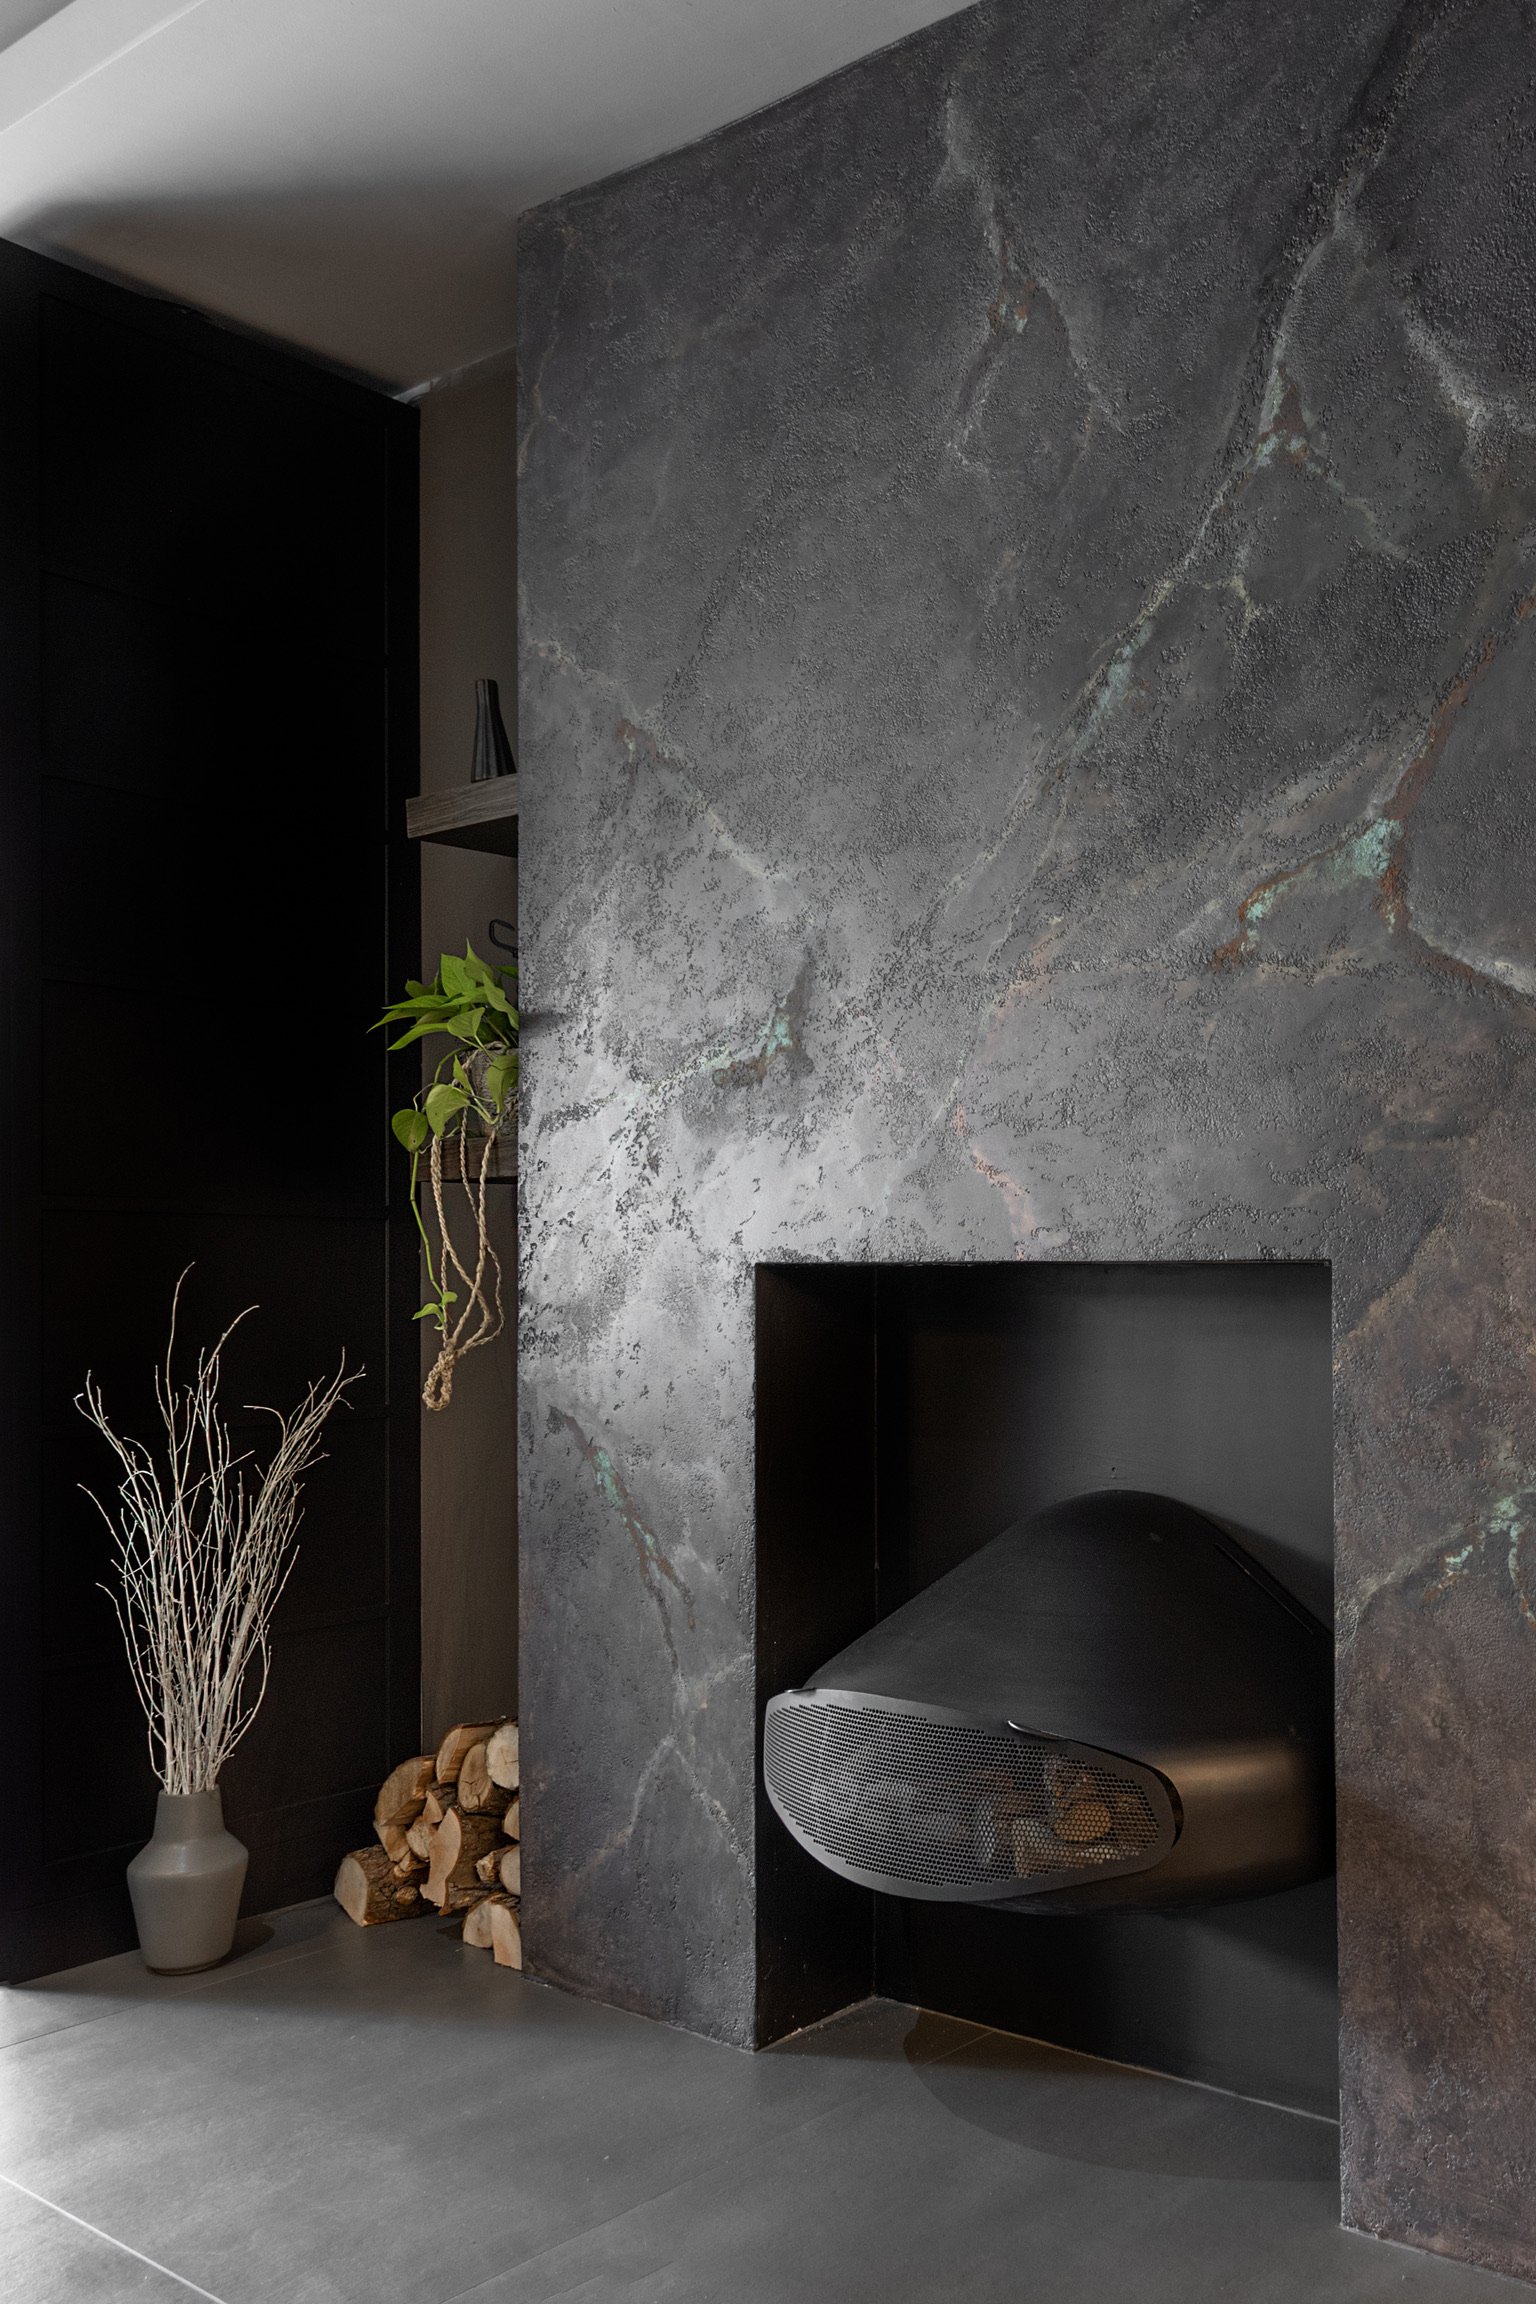
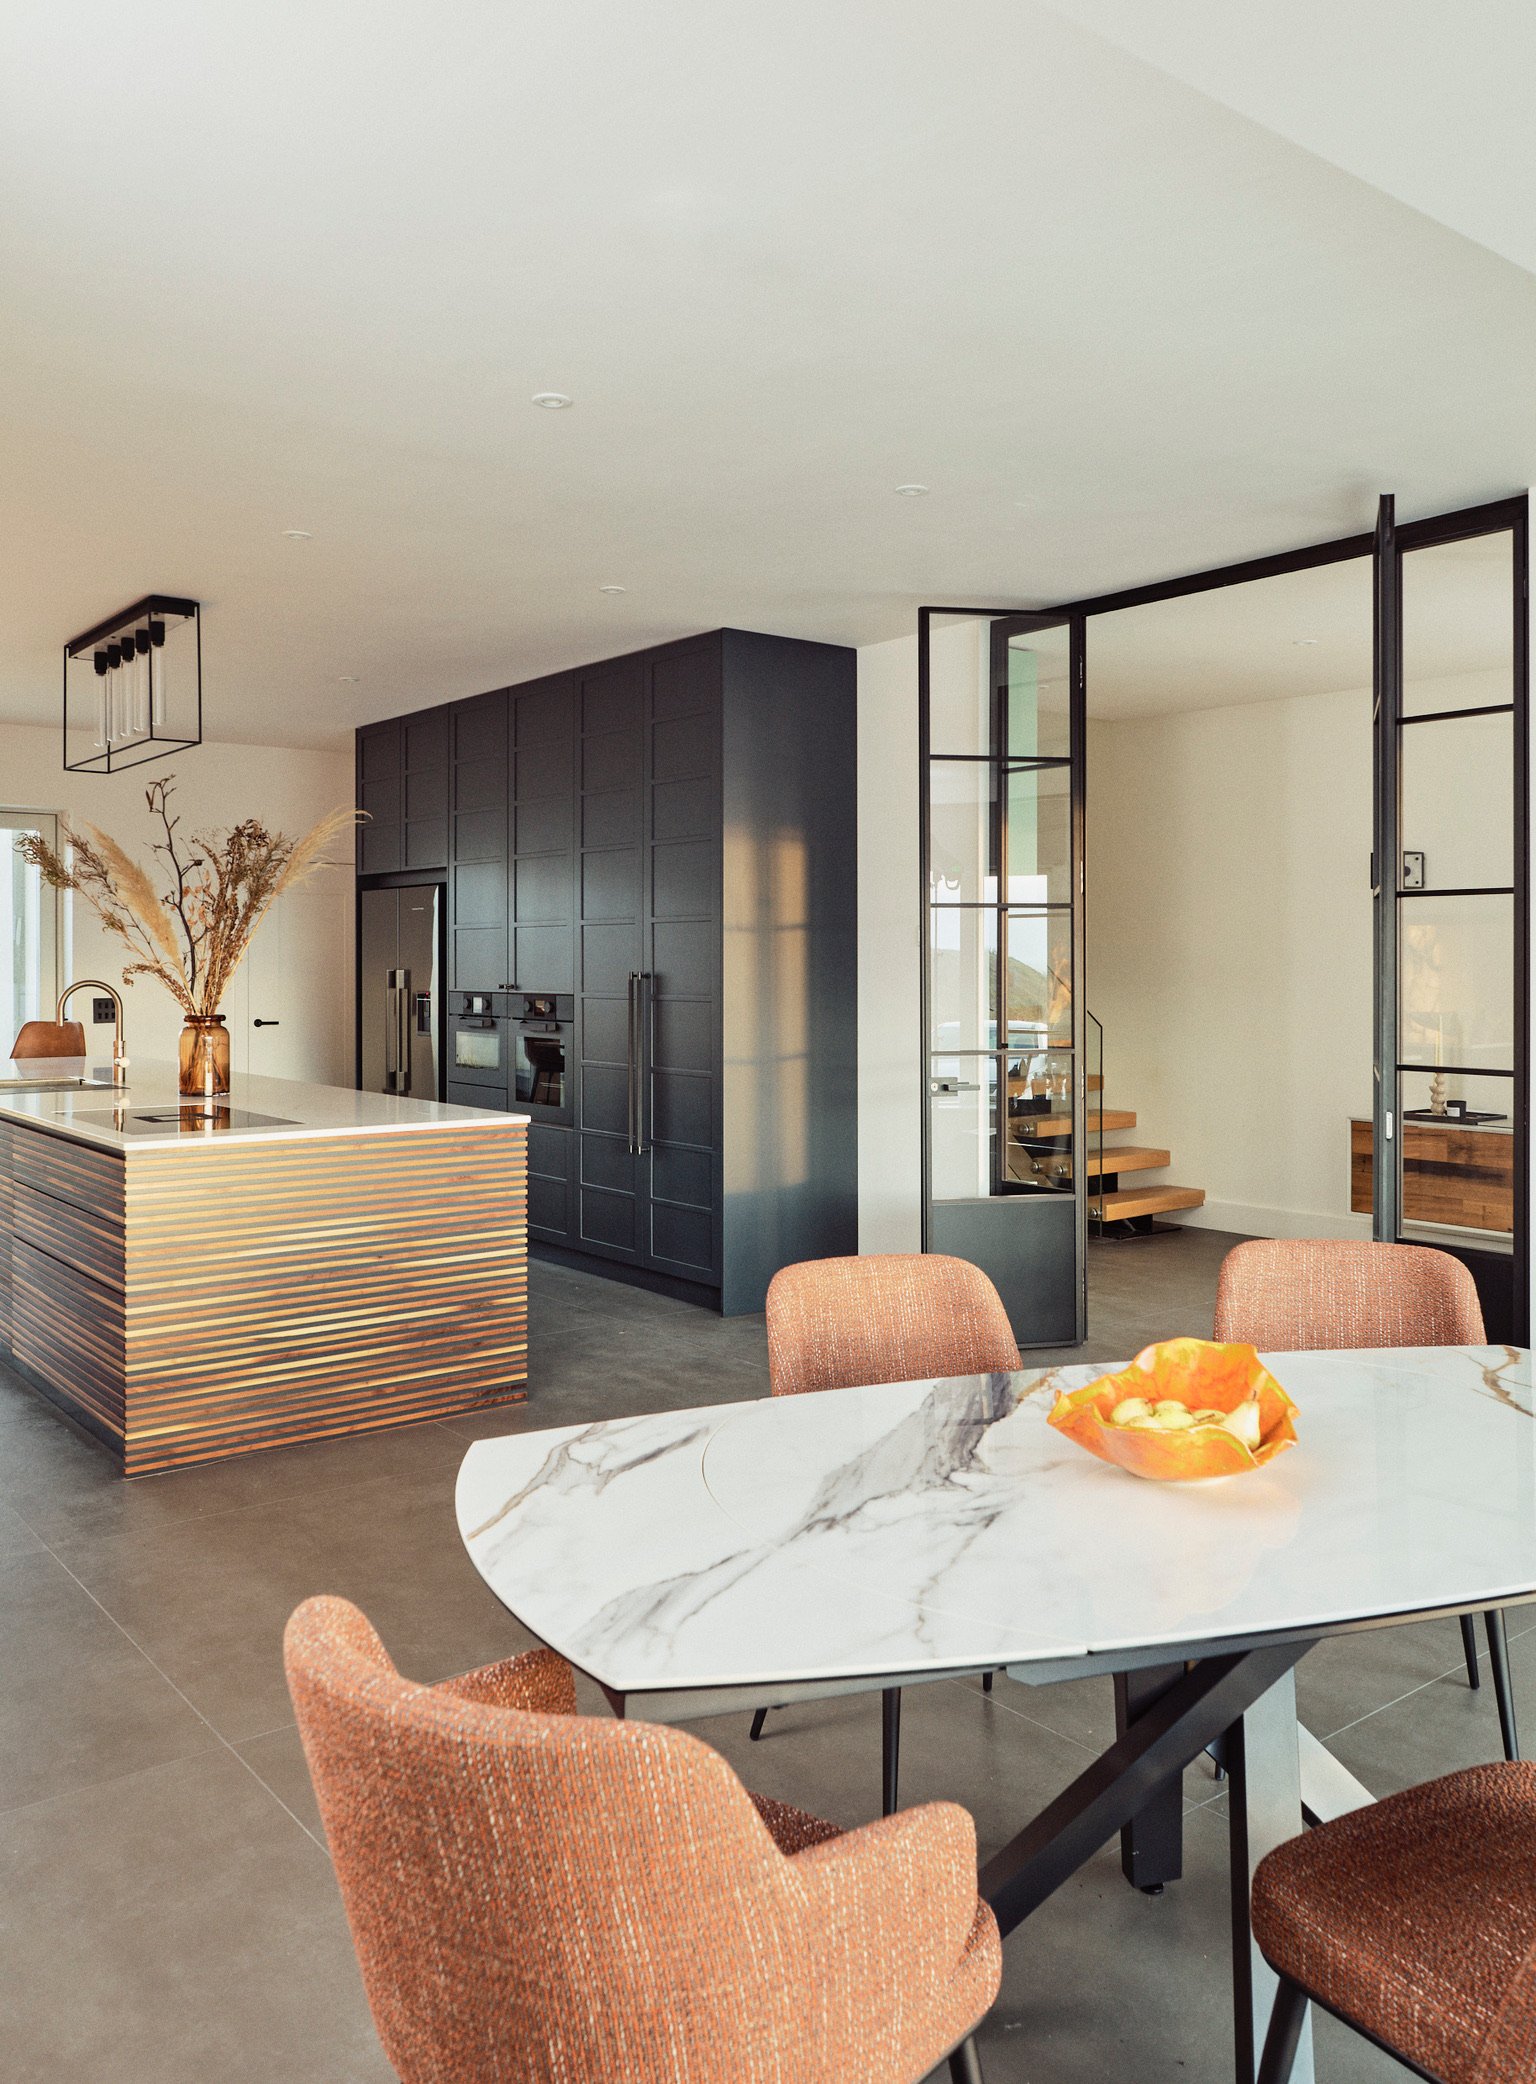
A residential interior feels coherent when its kitchen, furniture and architectural features share a considered design direction. That does not mean every piece must match. A kitchen, dining table and fitted bookcase can use different materials while repeating a detail, such as an edge profile, timber tone or handle finish.
Begin with how the household uses each room. In a kitchen, map preparation, cooking, serving and storage before fixing cabinet positions. Then coordinate worktops, appliances, lighting and adjacent dining furniture. A fitted bench beside the kitchen, for example, can provide seating and storage while connecting the kitchen palette to the living area.
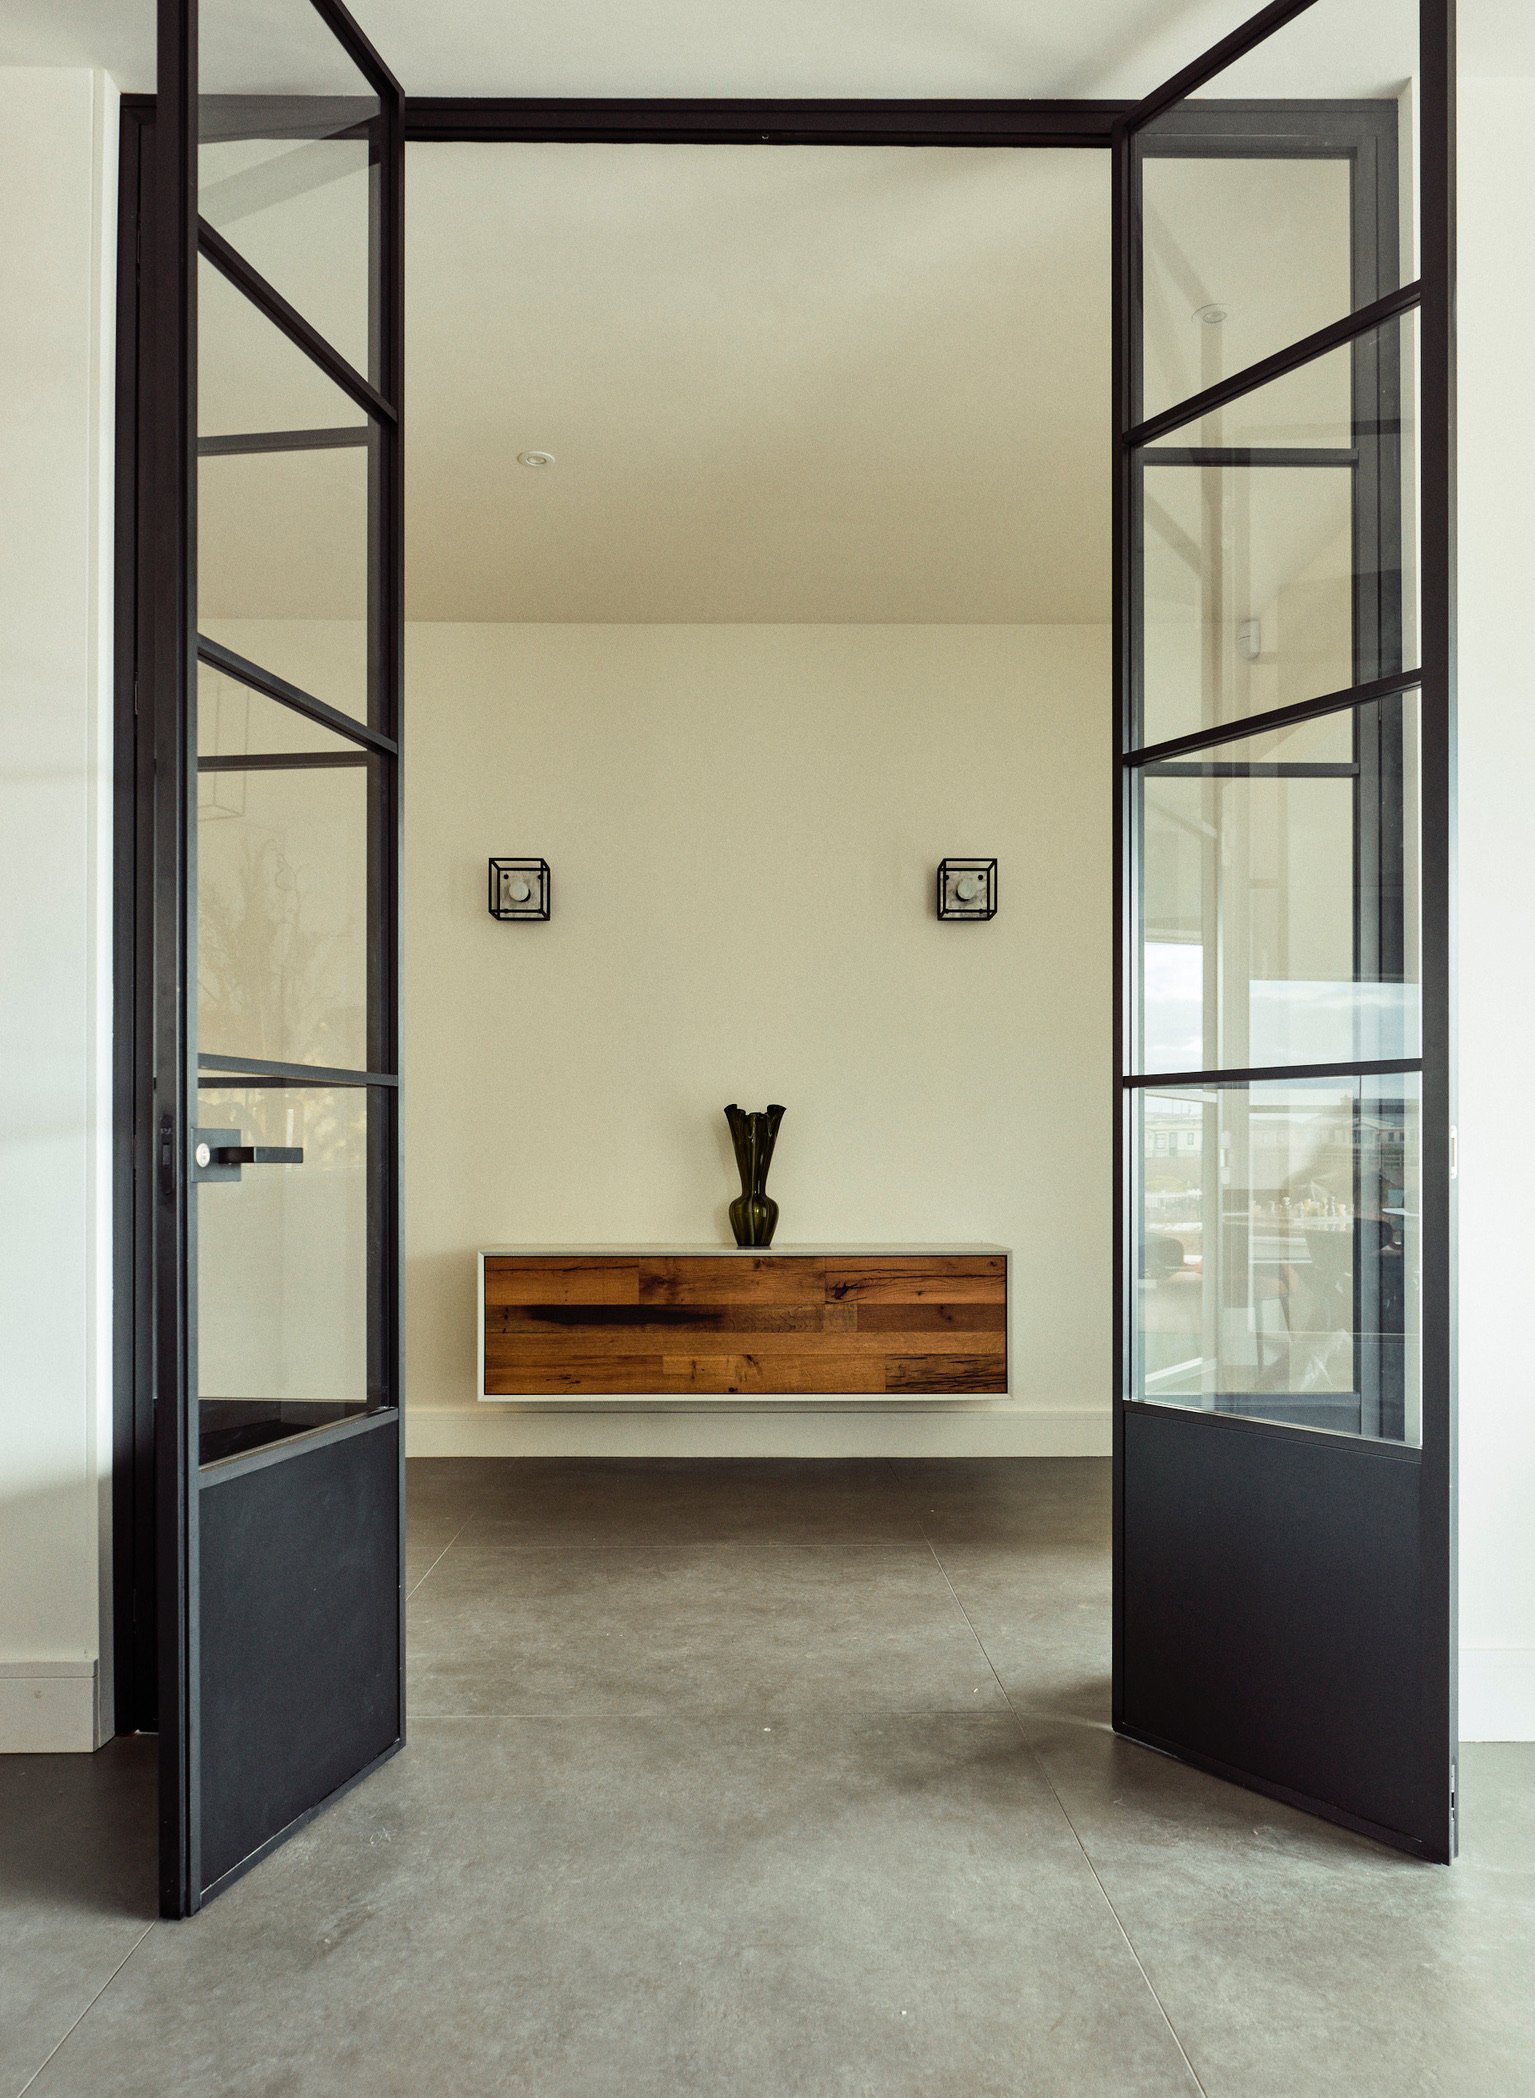
Furniture can give a residential scheme a distinct focal point. A commissioned table can be designed around the room’s proportions and circulation rather than treated as an isolated object. A bookcase might align with a doorway or frame a fireplace. In both cases, drawings should show how the piece relates to nearby architectural elements, floor finishes and sightlines.
Interior features can combine functions without losing their visual purpose. A reading nook can bring seating, book storage, toy storage and an artwork display into one composition. The Emma Green Design kitchen reading nook illustrates this approach, with cupboard doors finished in blackboard paint for children to draw on. Its details make the joinery part of daily family life, not simply a backdrop.
A media wall offers another example. The Emma Green Design media unit extended across a wall, with storage, concealed television wiring, and space and wiring for a table lamp. This shows why technical planning matters: equipment, cable routes and access need consideration alongside the elevation’s proportions and finish.
For a studio, define each piece’s role, agree the shared design language, then coordinate the technical drawings. Confirm how kitchen cabinetry meets flooring, where furniture sits in relation to circulation, and which details repeat across separate elements. Grain direction, veneer matching, edge profiles, hardware and neighbouring surfaces all shape the final composition.
The clearest takeaway is to design kitchens, furniture and interior features as connected parts of the residential scheme. Each piece should answer a practical need and reinforce the overall intent. That balance lets a kitchen feel integrated, furniture feel authored, and every considered detail contribute to the finished interior.
Neil Norton Design: Design, manufacture, delivery and installation as one managed project
Neil Norton Design works with interior designers to develop, make and install their designs, keeping authorship with your studio. This collaboration suits London residential projects where bespoke kitchens or fitted and freestanding furniture need careful coordination from drawings through installation.
Design, manufacture, delivery and installation are managed as one project. This gives the studio a route to carry its specification into the finished work, whether the brief includes a home office, study or home bar. Clear communication around drawings, finishes and site requirements helps align the work with the wider interior.
If you’re planning a project and need a joinery partner, contact Neil Norton Design to discuss how the team can work with your studio.
Carry your design intent into your next project
A strong joinery partnership is built on clear authorship, practical coordination and respect for the studio’s vision. For a London project, involve your maker while key details can still be resolved. This gives your team room to align the specification with the architecture and intended use.
A joinery partner for interior design studios should turn approved designs into carefully made work while respecting the designer’s authorship and client relationship. Neil Norton Design collaborates with studios on bespoke kitchens, fitted and freestanding furniture, and fitted wardrobes, walk-in wardrobes and dressing rooms, carrying the agreed design through manufacture and installation.
For your next residential scheme, consider which pieces need specialist joinery and what information will help the collaboration begin well. A clear brief, design intent and project drawings provide a practical starting point for a conversation with Neil Norton Design.
Your next project can reflect your studio’s distinctive eye, down to the last considered detail.
Frequently Asked Questions
What services should a joinery partner offer interior design studios in the UK?
A joinery partner for interior design studios should develop the studio’s design into bespoke manufacture, delivery and installation while respecting the designer’s authorship. A London residential brief might include a bespoke kitchen, fitted furniture or a dressing room. Set out responsibility for technical detailing, samples, drawing approvals, site coordination and installation in the project scope. This clarifies the joinery package’s boundaries for the studio and wider project team.
How do joinery firms coordinate drawings, surveys and installations with interior designers?
Coordinate by agreeing survey information, drawing revisions and site responsibilities with the designer before manufacture. Mark which dimensions reflect existing conditions and which depend on completed finishes, then record changes against the current drawing set. Before installation, align delivery access and room readiness with the site programme. A clear handover route for design queries helps the installation team resolve practical issues without changing the approved intent unilaterally.
What accreditations and insurance should a UK joinery contractor have?
Clarify how responsibilities and project requirements are documented, including the agreed scope, drawings, approvals and installation arrangements.
Which UK regions have specialist joinery makers serving interior design studios?
Specialist joinery makers are described as serving projects across London.
Comments